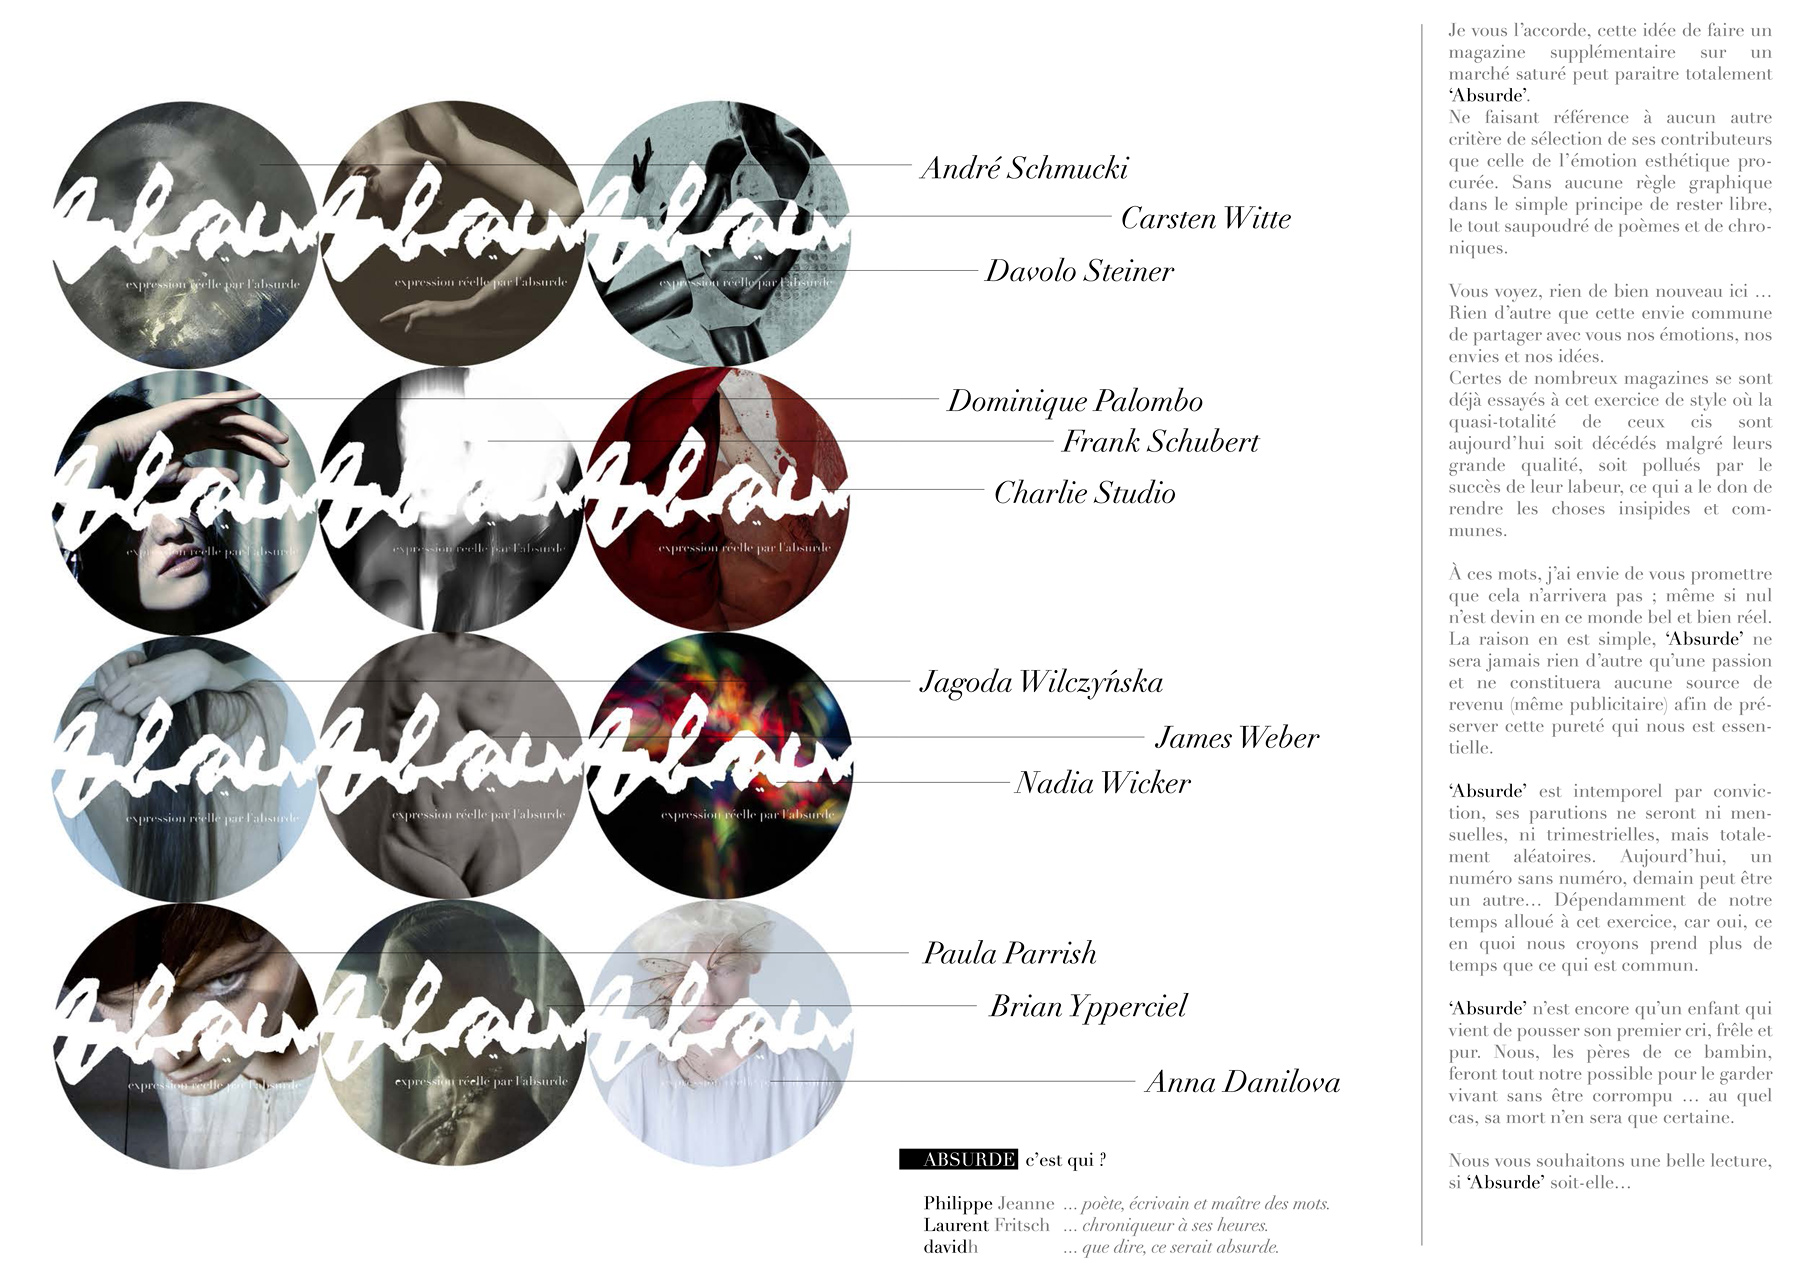
I’m very excited to have been included in Absurde Magazine’s May issue with so many talented artists.
Click the link below to see the magazine.http://issuu.com/davidh_psycho/docs/absurde-magazine-may-2013#download
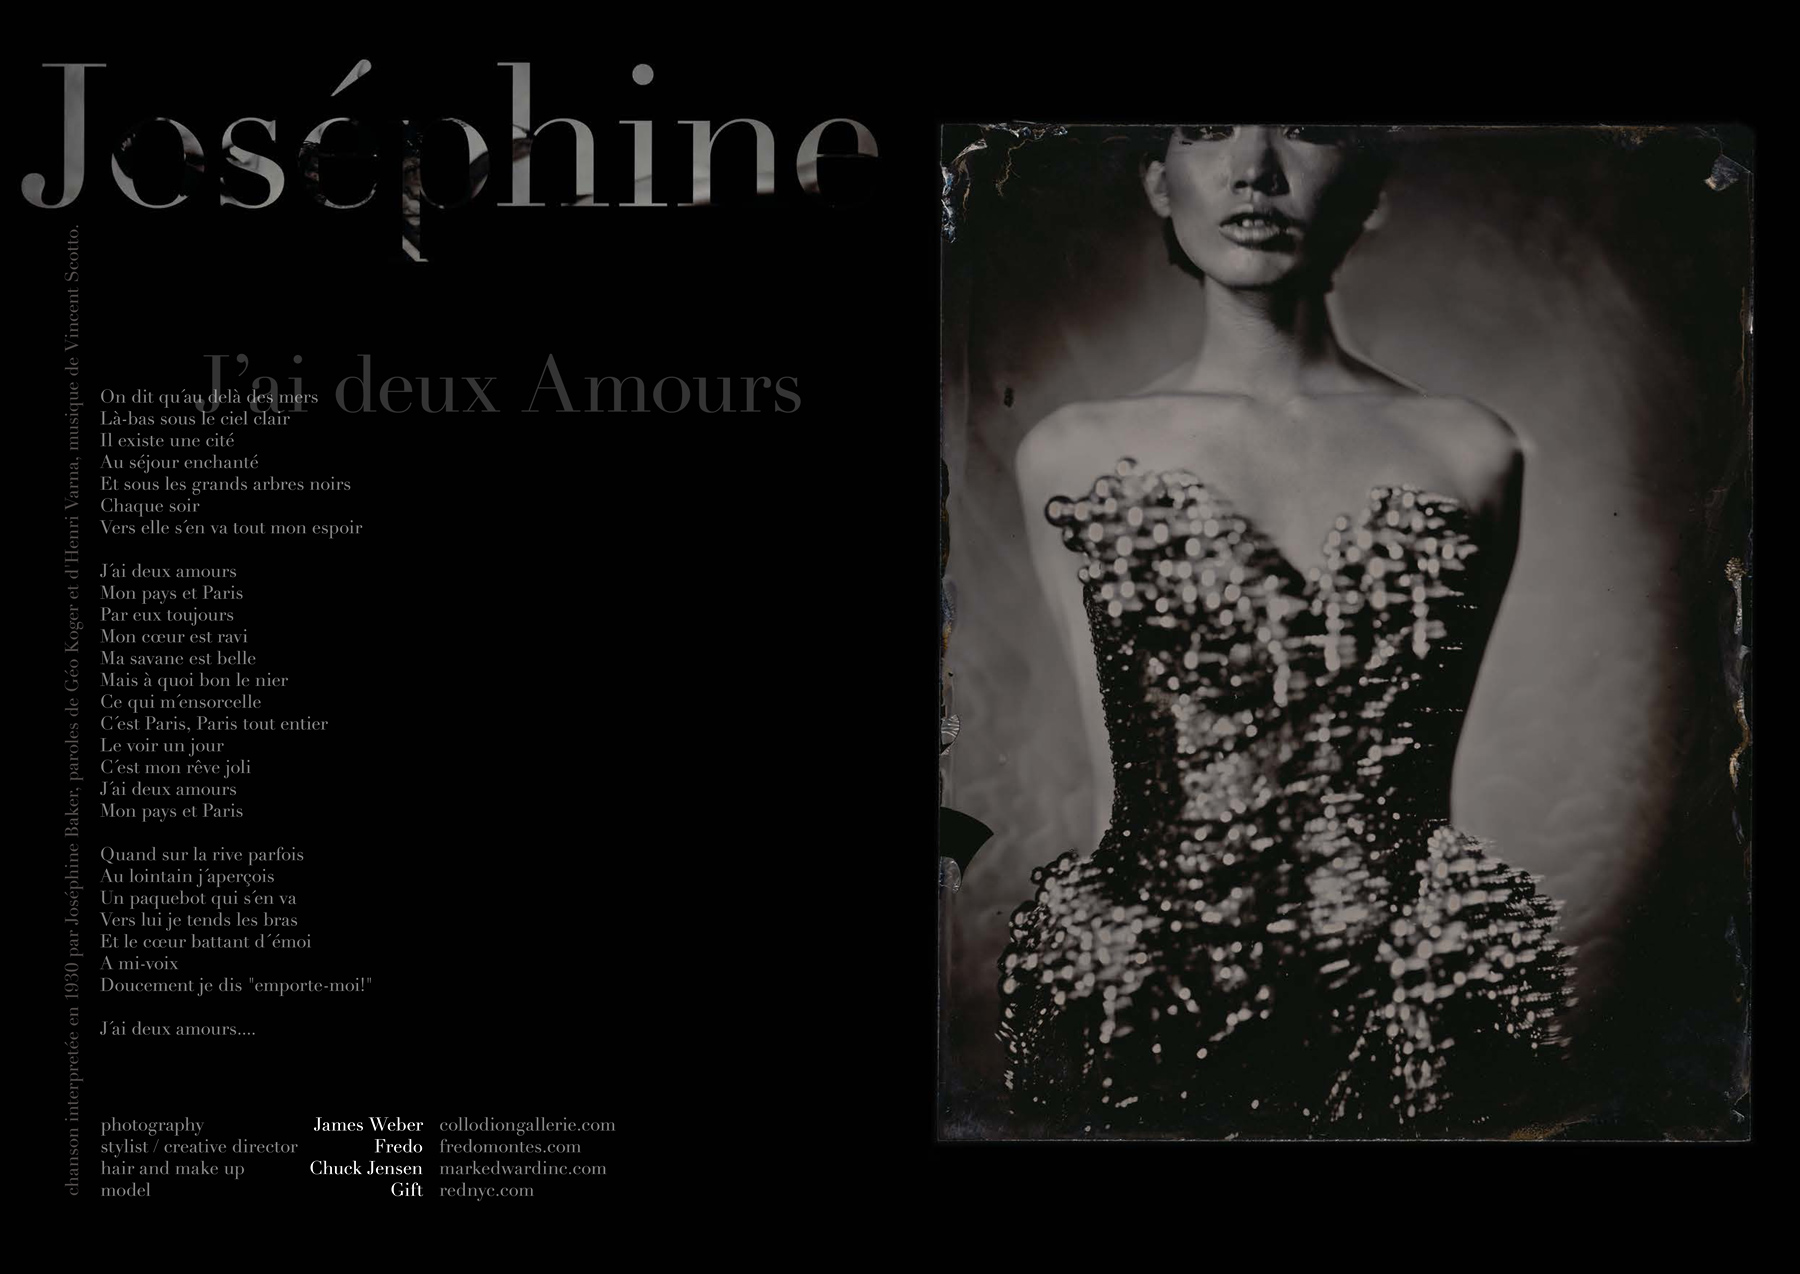
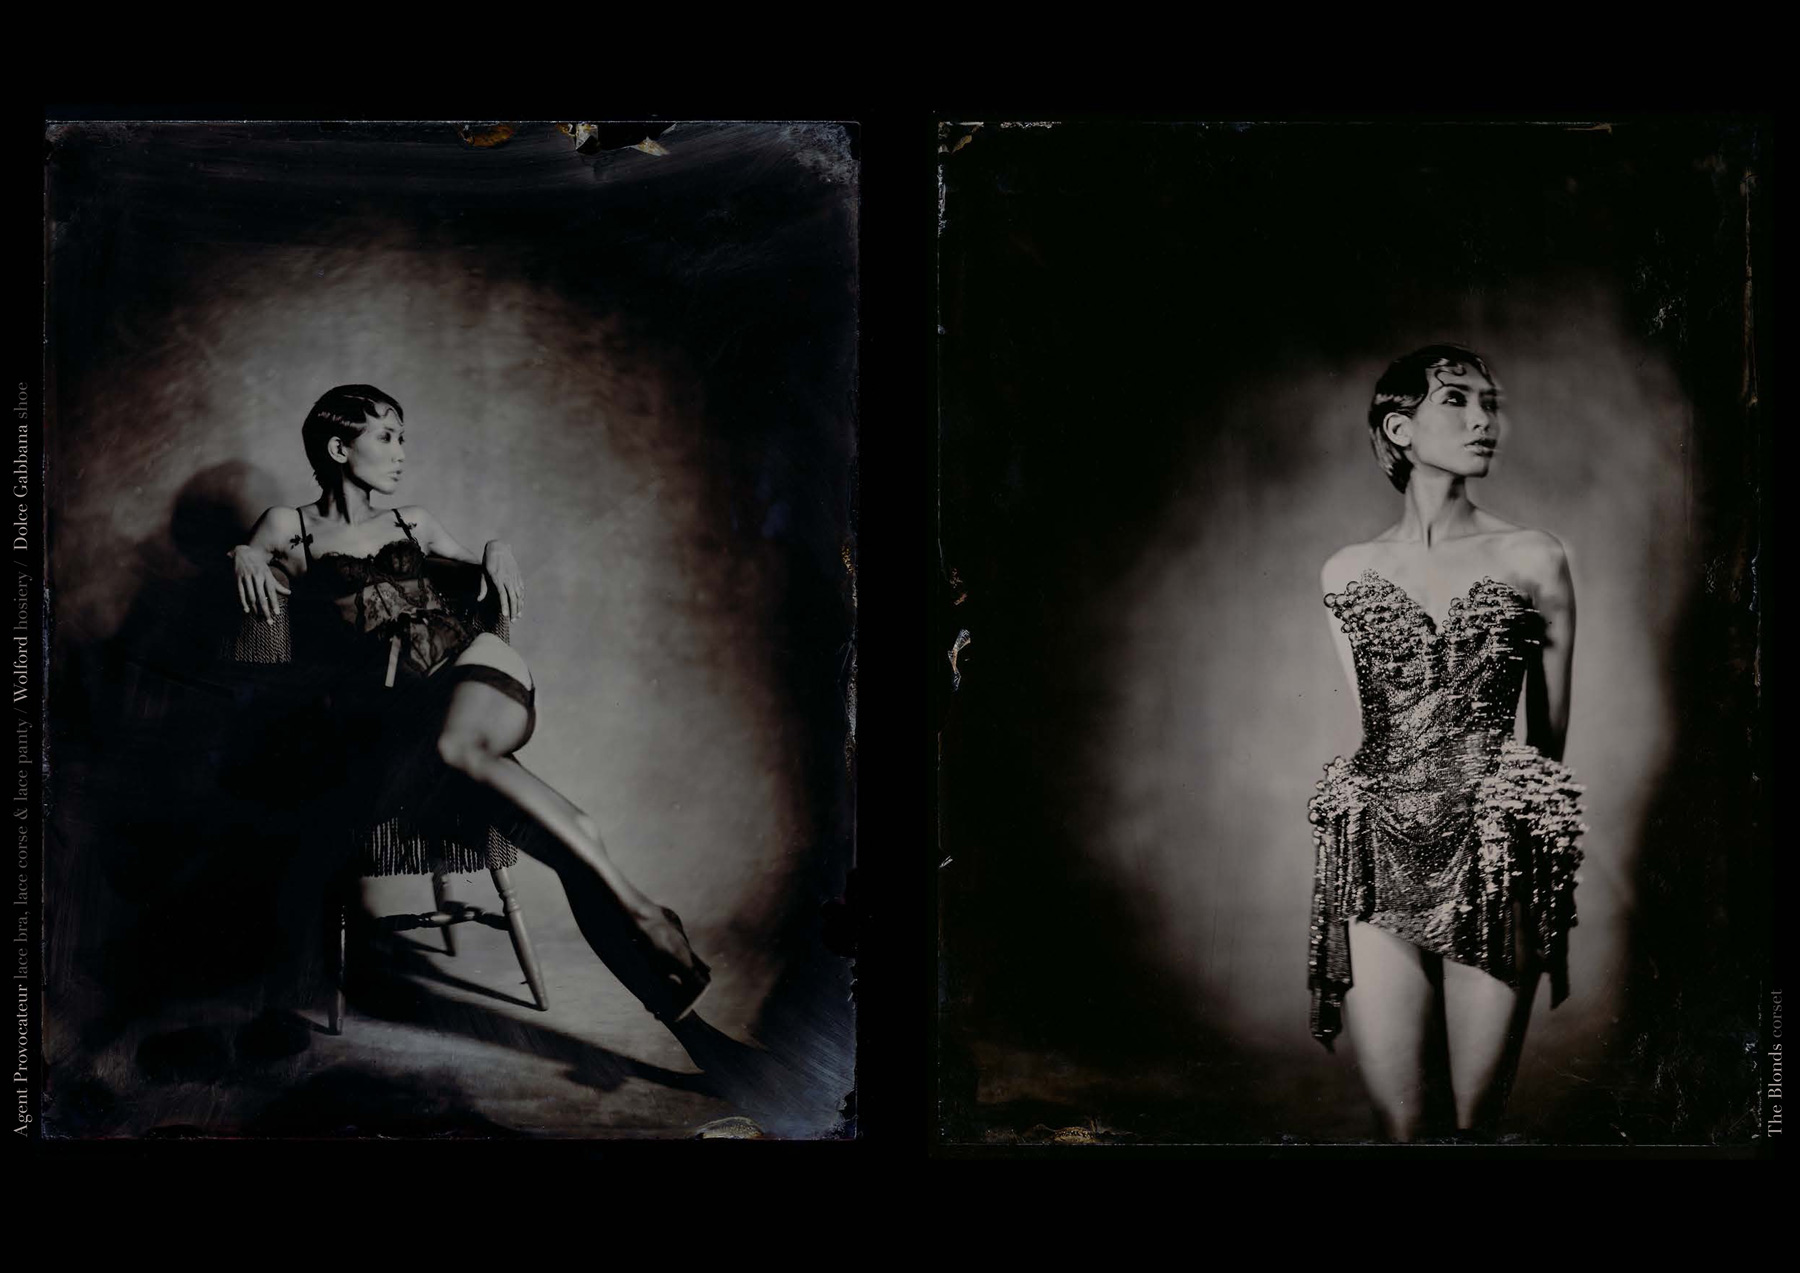
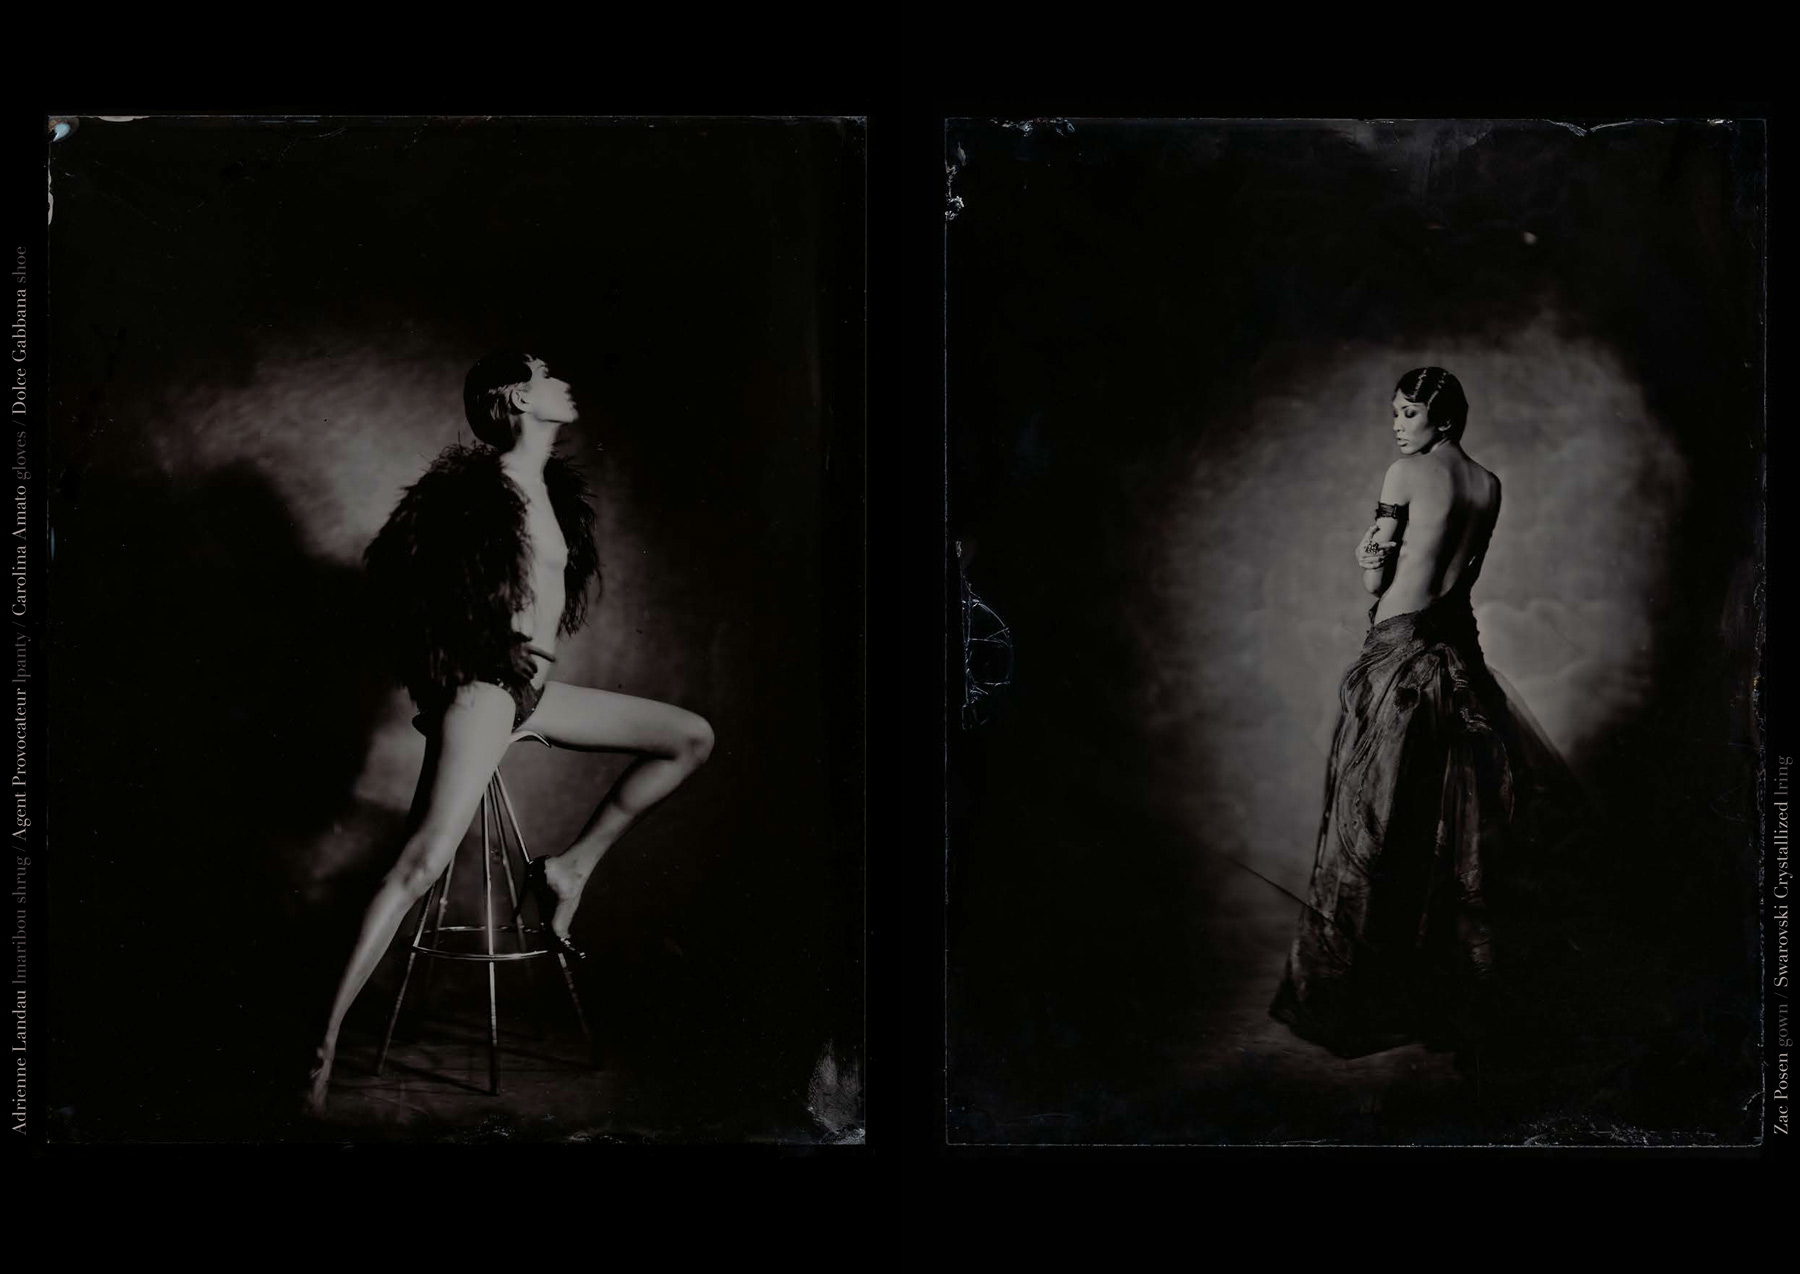
Photographer: James WeberStylist/Creative Director: Fredo MontesHair and Makeup: Chuck JensenPhoto Assistant: Rico ElvinaVideo: James SullivanCopyright 2013 James Weber
Click on the images to see them larger.
So this is Little Smokey's(Weed Tent Camera) first time out of the house. My buddy Rico Elvina and I decided to give it a try on location . There was a LOT of prep...we thought we had everything together...we got in our Zipcar Minivan, Shiloh, and took off. 30 minutes into the ride, we were talking about what we were going to do and going over the checklist. It seems we forgot to bring a few things. He thought I got it, I thought he got it...
1. The aluminum plates...kinda important.
2. The TENT FRAME!!!! REALLY important.
OMG...WOW....lol.
So, we headed back into manhattan, laughing at ourselves...because what else can you do? We picked up the supplies, and headed out again. Now, sadly, this cost us about 2 hours round trip. We already spent some time in the morning mixing chemistry. This put us getting to our location about 4:30pm. Time is of the essence. So I thought, screw it. No test plates...just go straight into 20"x24"...guess the light/exposure. Meanwhile, I had never shot this lens in daylight before(and it's only the second time I've used this camera), but we would not have much light to make adjustments, so I decided to just go for it.
MB9A9800
That's Rico streaking across the frame. Rico shot all of the behind the scene images today. Many thanks for coming out, Rico. :)
MB9A9776
MB9A9720
This is a shot inside the tent after it was all zipped up, so you can see the image as I'm seeing it in the camera. As you can see, the lens easily covers this 30"x40" foam core board.
MB9A9722b
MB9A9741
MB9A9751
Tequila bottles make the best collodion bottles. :)
MB9A9763
Fixing the plate.
Here's the two plates I liked the most...even so, they had some chemical issues. It's par for the course every now and then, though. Sometimes, it's a blessing and you get good results, sometimes you don't. This time, it's a mixed bag.
MB9A9840-2
Even though there are some chemical issues here with the streaks, I still think this one is quite beautiful.
MB9A9843
Things were FAR from perfect on this one as the chemistry definitely went off the rails on this one, but once again, it's still quite interesting. I did learn some things about tray developing large plates that I'll take with me to the next shoot. This is definitely a long term play and things will tighten up as I get more experience with this size and working in the tent.
The day was chalk full of great learning experiences. The need for a checklist is paramount. For the RV trip this fall, everything will already be in there, but right now, everything has to be brought with us each time, and it's quite a lot of gear to take on location. I think my collodion recipe was off somewhat, and there were definitely developer issues. So it's off to making more chemistry and planning the next outing a little better. :)
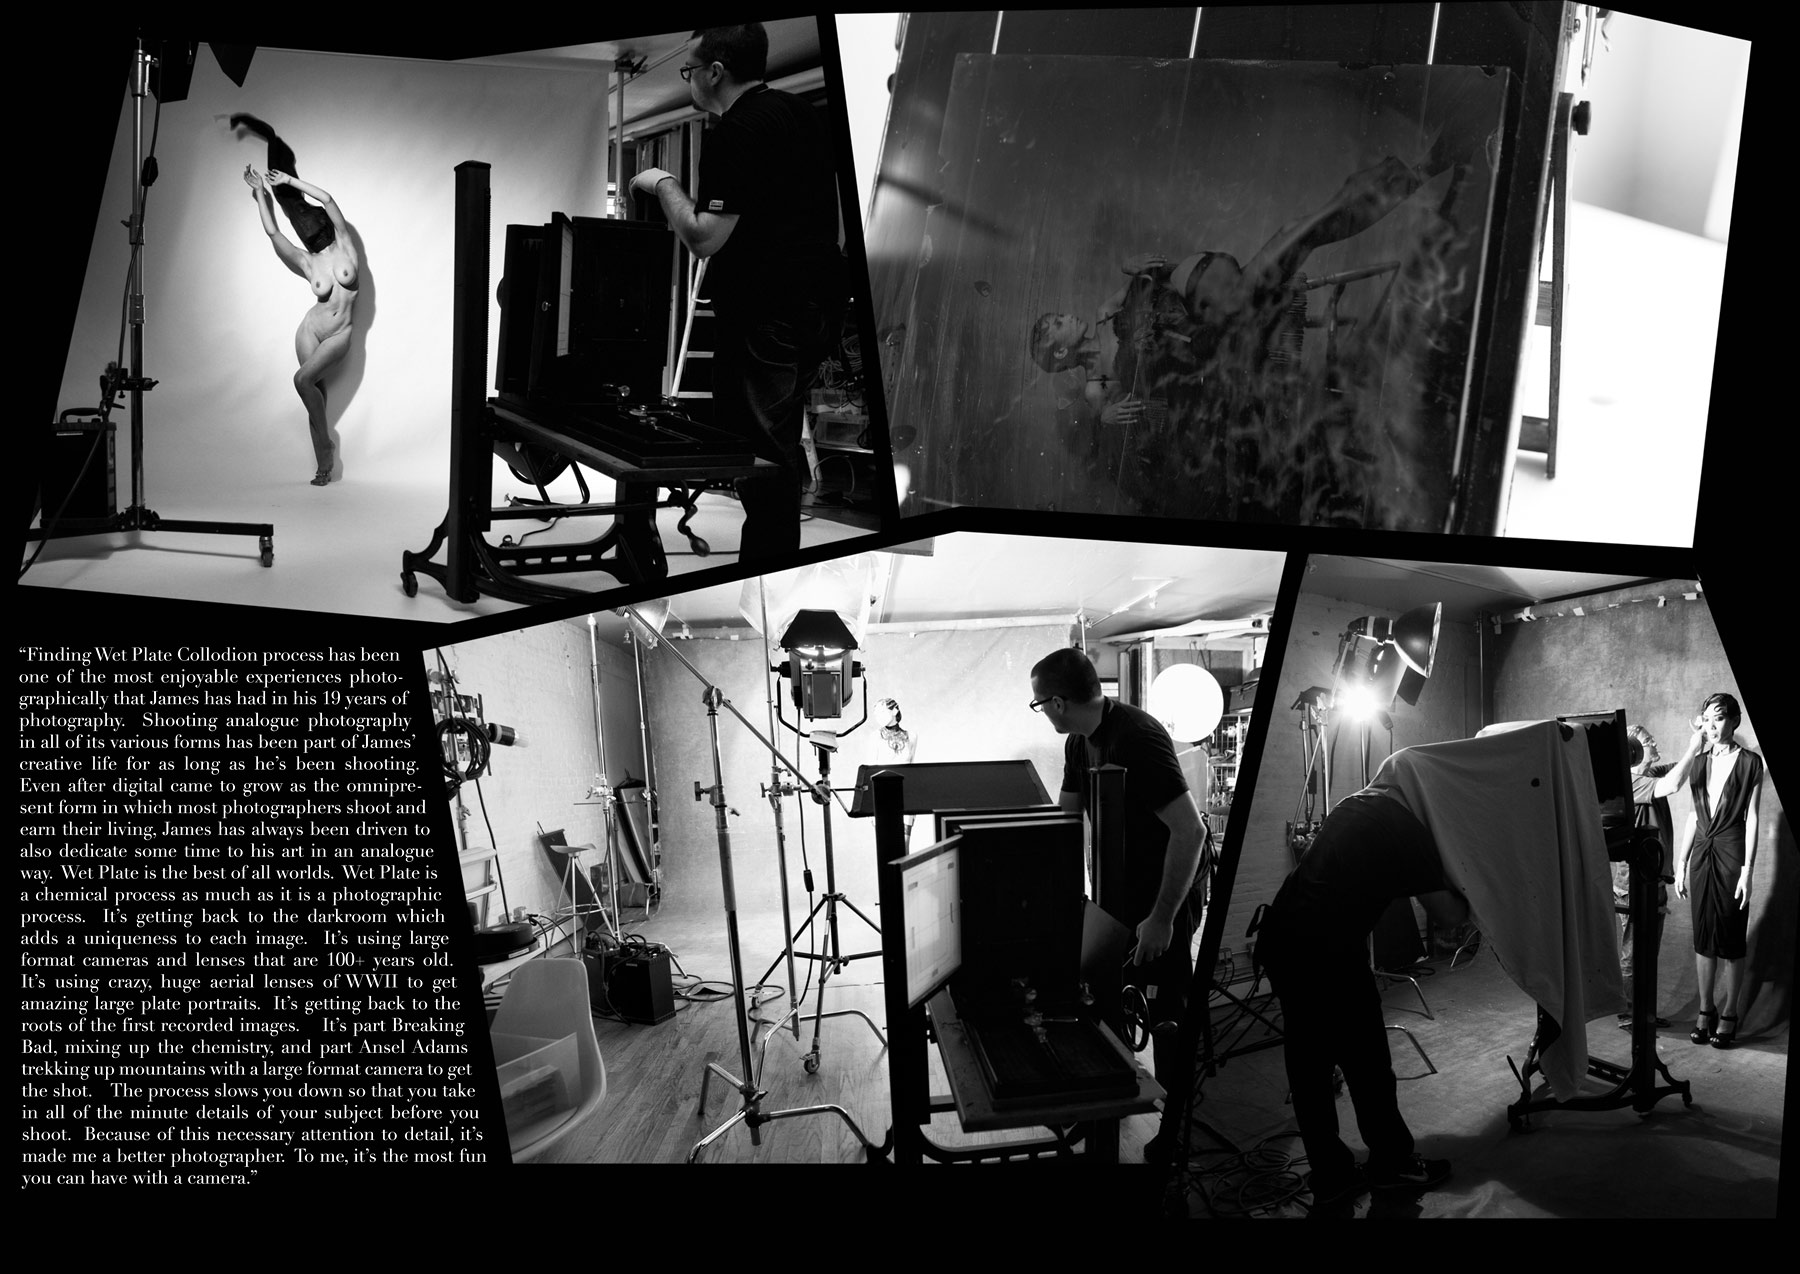
Ok, I've become a little obsessed. I guess when you go off into something new, it starts off small, but ends up becoming more than thought it would be when you started. It's frustrating, messy, complicated, fairly expensive, but OH, SO enjoyable when it works out well. I didn't realize how much I missed the darkroom and getting my hands dirty until I found wet plate. The process is wonderful. It slows you down and makes you think about exactly what you want to do. There is no rushing into anything. My friend Rico Elvina was kind enough to come by one of my shoots and take a few photos to show what goes into making tintypes, ambrotypes, and glass plate negatives the way they did in the late 1800's.
Since then, I've been a little busy getting all of the tools I needed to shoot wet plate. You have to be 1/2 alchemist and 1/2 photographer. There's a lot of chemistry that goes into just preparing to shoot. Some of it is quite hazardous. Wear your safety goggles at all times making the chemistry. :)
A little video of me showing all of the chemistry needed in the process. I was mixing up a new batch of developer and collodion this day...shot on my iphone.
Ok, the music is a little dramatic, but I had to set the tone for the scene...haha. ;)
Preparing the plate with Collodion...
In the image above and below, I'm pouring collodion on the glass plate and am pooling the excess into my little patron bottle. This creates the base upon which the silver nitrate can attach to the plate and make it light sensitive. Patron bottles are the best thing to use as they are really strong and have a nice wide mouth...and you have an excuse to buy them full...hahaha. The box next to me is called a, "Dark Box". It's where you load the sensitized plates and develop them.
Showing my model, Anna the process. I Loved the coat she was wearing. It's very, "Game of Thrones". :)
While I'm waiting for the silver nitrate to take hold(3 minutes in the tank for ambrotypes), I get the subject in focus.
To focus, you push and pull the back plate until the image is in focus where you like.
The image is upside down and flipped horizontally as well. Type reads backwards in the final image.
Above: I've got a headlamp on with a red filter on it for use in the dark box. Collodion is not sensitive to red light, so it's the only light you can use to see what you're doing in the dark.
Me with my Anthony Imperial Climax 8x10 camera. The lens is made by Voightlander and is circa 1875.
The light I use is extremely bright. It sounds like a gun going off when the light fires. You have to use a LOT of light in wet plate, as collodion is about 1 ISO, or needs 8 times more light than a normal camera at 100 ISO.
Ok, my apologies in advance. :) It's not the most flattering photo I've ever taken...lol. This is me inside the, "Dark Box" developing the plate. This has to be done in a dark room or dark box. The good thing about the dark box is that you can put it in the back of an SUV and take this show on the road...
Now the fun part...fixing the image and seeing it for the first time.
To see the image, you have to put a glass plate negative or ambrotype in front of something black. The tank behind the image is the Potassium Cyanide Fixer. Really dangerous stuff. You have to be careful not to ingest it. It's poisonous. Respect the chemistry at all times...
Here are some of the plates I shot of Anna that day...
8"x10" Clear Glass Negative
8"x10" Ruby Glass Ambrotype
8"x10" on Black Aluminum
8"x10" on Black Aluminum
There was a second model the same day, but unfortunately we only got off 2 shots. Something was wrong with the chemistry. Her name is Kate and I hope to have her back again soon to finish up our shoot. :)
8"x10" on Black Aluminum.
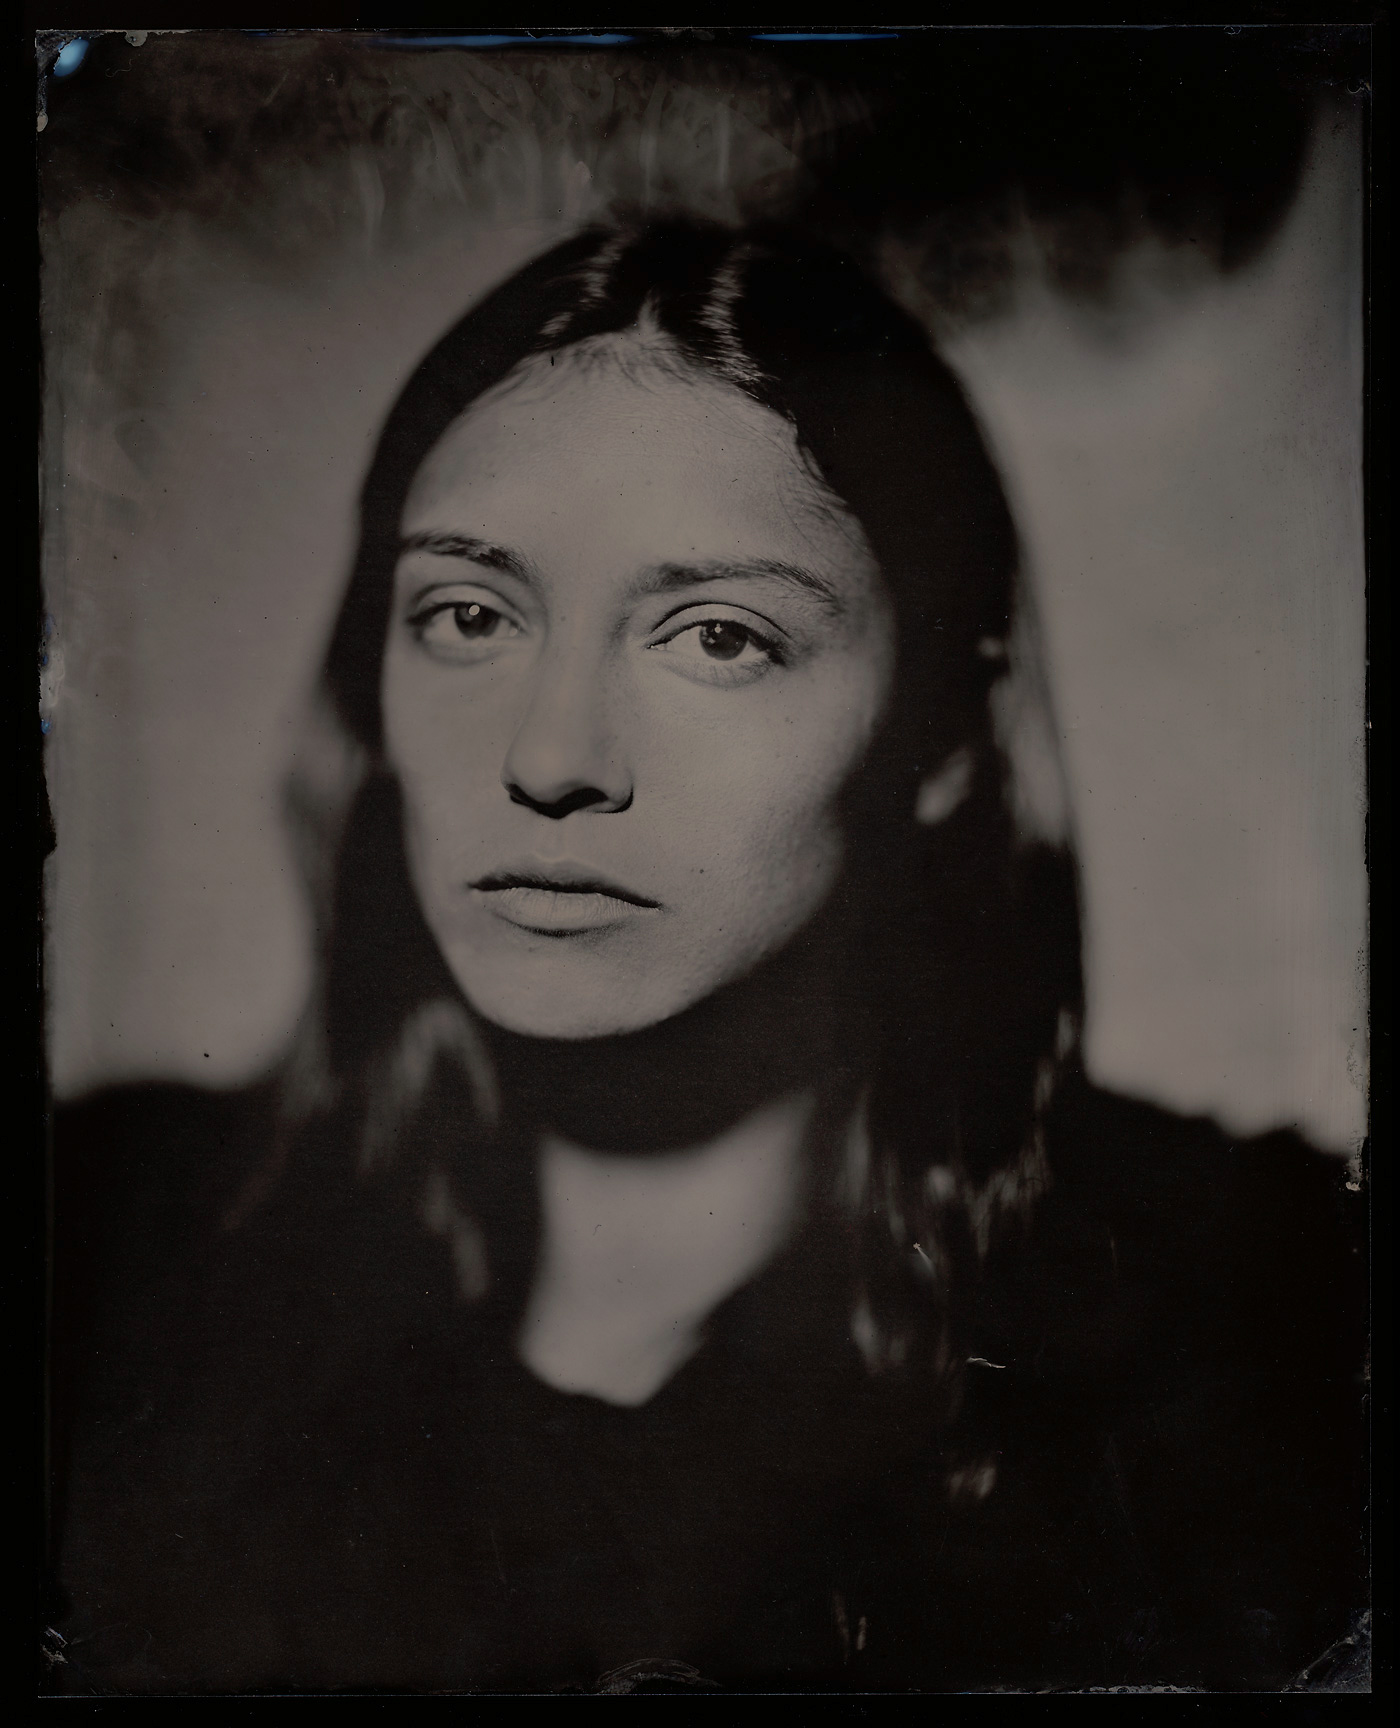
I've just started this portrait series, "Faces". I don't know where it's going to take me, but I don't have too many parameters to confine it. My main focus it to shoot very natural images of people. Not a lot of hair/makeup. Try to get something in them to come out on the plate...strength, vulnerability, sadness. The eyes are the windows to the soul. Every now and then they let something out. Hopefully I can capture something in them.
Many Thanks to my good friend, Jesse Mata, who is also a wet plater and has given me so much help and support with this process. He has also lent me his 11x14 camera to play with...should be even more fun. :)
Would you trust this guy?? haha...I took this self portrait...my "Yoda in the woods" shot on John Coffer's farm. This was where I learned to shoot Wet Plate. I wrote about that experience here: http://jamesweberstudio.com/blog/?p=1376
Along with the other work that Cat and Kerri did with me for my Black Silk Nudes project, we shot some wet plate that day as well. The first one, below is an 8x10 Ruby Ambrotype.
Here's a photo that show the color of the glass...Ruby Ambrotypes are nice. They have a nice warm feel in person, but if you put something black behind it, it looks like the above image.
The above image was shot on alluminum.
This one was shot on Black Glass.
I also had some fun with my Polaroid SX-70 and The Impossible Project's Instant Film, PX70 COLOR SHADE for the behind the scenes.
And here's a few of Kerri. My favorite of the day was this one, below...on alluminum
The light was a 2K Arri with a silver card fill. 12 seconds
So I recently picked up a few boxes of the new Impossible Project 8x10 instant film. I've been waiting for this for a long time. Polaroid made the last 8x10 batch in 2006. It's been so long that the pods have all dried up, which makes it unusable even if you could find a box on ebay.
Enter the Impossible Project. The Impossible Project had bought all of the 8x10 production machinery from Polaroid just days before they went into bankruptcy. They focused on all of the smaller films first, but finally, they were able to put their attention to starting up the 8x10 production. This is some of the film from the first production run. I took a workshop at The Impossible Project office to make sure I got a handle on how to use the new film. It's not a peel apart film like the original polaroid was, although you still need the polaroid processor to use it.
First thoughts are this is a very cool development for old process lovers. Being able to shoot this format will bring a whole new generation to large format photography and keep it alive. The artistic possibilities are also something that you will never get from digital or some filter that becomes the new rage. Instagram can't create these effects. There is something to be said for doing it the analog way.
Below are the two shots I took. One of their employees, Kyle, was kind enough to model for me.
You could actually just keep it like this and that could be your final product. But....there are other options of what you can do with the new film. I experimented with 2 of the options.
1. Do an emulsion lift and put the lifted emulsion onto some other medium. In this case, I put it on some 300 gsm matte paper(below), which is my favorite application for polaroid.
2. Scan the negative side, invert it, and blow it up from there(Below). I definitely see some fun applications for this. I love the dark, mysterious nature of this.
First things first. Get your tools together. Cut off the edges of the film first. That will make the lift so much easier.
So, I took a few videos showing how I did the emulsion lift. It's a little different from the original polaroid lifts. You used to have to boil water, then put the polaroid in. With the Impossible Project film, you just need hot water, comfortable to the touch.
Just play them one right after the other to see the process.
Sorry about the sloppy film work here...I took my eye off the camera a few times...lol.
Ok, so I forgot to shoot this image for the other photograph...so this is where you use a piece of transparent film to get the emulsion out of the water. You can now shape the emulsion how you wish it to show up on your fine art paper.
So I used a 300 gsm paper for my base. It's good to use a thick paper as otherwise the wetness will make it curl up. I used Matte Medium for the adhesive base. Just use a brush to apply evenly.
Once again...sorry, we're switching up images to show you the last phase...forgot to film it on the other one.
.
Here's the inverted Scan again. You have to bring down the blacks quite a bit to see all of the detail.
It's funny, I learned that by baking the emulsion in my attempt to dry it out faster, it actually made it turn sepia. So, if you like that, get your bake on. 300 degrees, keep the door open, and cook until you like it...just don't burn it. ;)
As you can see, it now has a sepia tonality to it on the top. The print was hanging out of my little toaster oven, so the bottom is still more black and white...so I thought I'd keep it that way.
Well, that's it for now. I'm going to do another shoot from start to finish and try to make it one movie next time. Until then, I hope some of you go out, pick up some film, and keep this wonderful large format art alive!
[The group of us at John Coffer's Farm studying Wet Plate Photography. I'm on the left in the back...]
I’ve been a professional photographer for around 18 years now. In that time, I dedicated 6 wonderful years in the U.S. Navy as a photographer. This is truly where I fell in love with photography as a process and an art. Back then, it was all film. Black & white, color, darkrooms, chemicals..it was crusty and dirty, but it was fun! The processes were harder to do, but really satisfying when it was done right. When I was in the darkroom and I saw the image coming up from a print in the developer, it really was magical.
Well, time has marched on and things have gotten simpler and more accessible to the masses. Digital has come of age and photography has become…truly…easy. Now, I’m not saying anything about anyone’s talent, or eye, or anything related to their photography being good or bad, I’m just talking about the process.
We’ve come a long way, but there is something to be said for taking the long road, or the road less travelled. Taking your time and doing things by hand. I was in search of just such a thing when I visited the farm of John Coffer to learn from him the skills and techniques needed to shoot Wet Plate successfully.
Instagram has proven to society that what it wants is what we once had…what once was. Borders on images, light leaks, scratches on film, different color temperatures, square formats, polaroids…all of it. We, as a society, are eating it up. What we are trying to get is what we once had, but easier, simpler, NOW. We are living in the very spoiled age of instant gratification. Anything we want is at our fingertips, to a point that if something takes too much time, it gets discarded and a faster, easier route is looked for.
I found out about wet plate photography and was completely enamored with it.
It’s name, Wet Plate Photography, comes from the fact that you have to put a wet chemical, collodion, on a surface(glass, tin, aluminum). Then, you have around 10 minutes to shoot and develop that plate(time depends on the heat/environment) before it dries up. After it dries up, you don’t get an image. So it’s challenging in the field, but very do-able. The final result is so unlike any other form of photography. It’s beautiful.
Each glass negative, ambrotype, or Tintype made takes around 30 minutes or more to make from start to finish. It slows you down and makes you think about what you’re shooting.
My trip to John Coffer’s farm in the woods was born out of a desire to get back some of the simple joy it is to see the image come up again in front of me, get my hands dirty, and create something from nothing. I didn’t realize I missed it until I started buying polaroid and film again. The analog nature of it was giving me something that digital just didn’t. I didn’t want it, “simple”, anymore. I wanted to put the magic back into photography.
So what this post covers is my journey to John’s farm and some of the experiences and photos taken during my time taking his class. What I can say unequivocally is that is was a profoundly eye opening experience and one that I would like to share.
This is just the first step, the first experience, in what will be an ongoing exploration of this early art of photography.
It all started with a long drive, just me and Delilah(My Zipcar)
Definitely one of the things I miss living in the city…trees, mountains, fresh air, wide open expanses.
At the lodge now…loving the sky.
I‘m off to Coffer’s now. You know you’re getting close when you hit the dirt roads. He’s a little bit off the beaten path.
We have arrived. This is also John’s only form of communication. He doesn’t have a phone and he’s proud of it. U.S. Mail all the way…
So This is where it all happens. The tent in the middle has a darkroom, a sink, and is filled with all kinds of historical cameras, lenses, and old tintypes. This is where he did most of the teaching, although we shot all over the farm.
This is what John rode around in for 11 years pulled by Oxen at 2 miles an hour. He was recreating the life of a 19th century photographer. It’s got a full darkroom inside. If this thing could talk…
The deep sink for washing and fixing the plates.
This is called a, “Dark Box” and is what you use in the field to develop your plates. It’s basically a portable darkroom. I need to build one that can fit in the back of an SUV so I can take this show on the road.
These are all the chemicals you need to do wet plate. On the left, in the box is your Silver Nitrate bath. The yellow liquid is your developer, then the little bottle is Collodion, and lastly, a jug of water to pour on your print to stop developement.
Here’s a few shots of John’s home and some shots of the farm…
This is John fixing the plate he shot of the class.
This is the first portrait I did of John. It’s also my first plate. We started out small as it’s easier to get a handle on how to put the collodion on the plate that way. It’s a 4×5 tintype. You can click any of the images in this post to see them bigger.
This is me fixing the second plate I did of John. It was shot on Ruby Glass.
This is the image in the above video that I shot of John. The Ruby Glass prior to me shooting it(below).
John, shot through the ruby glass filter…teaching away.
In general, the farm is awesome. As I live in New York City, I need my nature fix to get me balanced. He’s got many animals on the farm. Horses, a donkey, cows, bulls, a cat or two…and lots of chickens. I have come to appreciate how cool chickens are during my time at John’s. They will just randomly follow you around the farm. They’ve just got one thing on their mind…food.
I found out they like Doritos, donuts, pretty much anything that we consider food, they’re good with.
With that in mind, for one of my plates, I decided to dedicate one to, “The Chicken Whisperer”. See below. The chicken actually stood pretty still for this…lol.
Here’s the “Chicken Whisperer” getting fixed. I had thought I was shooting vertically, but I had put the plexi holder in horizontally. Fortunately, I had framed him up in the center and still got a good image…lol.
This is the glass plate negative(clear glass) that I shot and the albumen print made from that glass plate(below).
Below is the albumen print, “cooking” in the sun. Very cool process to create your own photographic paper from egg whites(albumen) and silver nitrate.
james-weber-photographer-07242012_3312
So after lots of instruction, we were off shooting what we wanted to on the farm. I set up a few shots in the woods. This is the first time I’m getting to use the camera I bought. It’s an Anthony Climax Imperial Camera, 8×10 camera. As I have not gotten a tripod for the camera, I used one of John’s wooden benches to get some lower angle shots.
Getting my Luke Skywalker in the swamp moment.
Another little solarization in the bottom right hand corner. You can see the nice swirly bokeh in the top of the shot. That comes from the Petzval lens design in the old brass lenses. This lens is a Voightlander. I love it as I plan on doing portraits with it and it has a very short depth of field when the bellows is extended.
james-weber-photographer-07242012_3322
So John was telling me, when I asked about putting the camera back into the bull’s pasture to be careful as they like to, “investigate” things as a bull had knocked his camera over once before. Of course, I didn’t listen. Now, I had to go get the bench, place it, then go back and get the camera. This is what I saw when I got back. They were “investigating” the bench. It’s a good thing I had not brought the camera out there yet.
My last two plates I shot at the farm were of John and his girlfriend Ann. I’m very excited by these as I’m looking to do more portraits via glass plate negatives and tintypes.
As we were in his house learning to do albumen prints, I saw him from the side and thought a profile photo would be nice. You can see the head brace in the shot as well. I think the exposure here was 4 seconds in open shade.
And one of Ann…
I love both of these. Ann has such character. The beauty is in the little details, and also in the mistakes. The top left hand corner of John’s did not get processed very well, so when I took it out of the dark box, the sun hit it, then I fixed it, solarizing the corner a little. The blue line on the right is where the collodion was a little thick and did not quite develop. So, technically, there are some issues, but that’s also part of the fun. You never really know how it’s going to turn out until you develop and fix it.
Finally, we get to the Mammoth Plates. John has a 20×24 camera that we each got to shoot. It was much more difficult to prepare, shoot and develop. I was wanting to go big, but I think I’ll be shooting 8×10 for a while. There’s plenty of time for that later.
james-weber-photographer-07242012_3321
This is me pouring collodion onto the mammoth with John’s help. Not so easy.
Here’s my 20″ x 24″ Mammoth plate image. So I was going for a little, “Cowboys and Aliens” here. John was a good sport to put on the glasses, grab one of his vintage guns, and get into the act.
At the end of the day, we all gathered around the fire and cooked up some brats, had a beer, and relaxed. It’s a lot of work carrying around those cameras, tripod(or bench in my case), setting up the shot, getting the plates poured…going to shoot it…going back to develop it. Finding out it’s not right, and doing it all over again. Then finally, Fixing it, washing it, drying it, and varnishing it. It really is great fun and I’m already planning my future shoots.
Thanks for reading. I hope you enjoyed this look into my first experience shooting Wet Plate Photography.
Now where’s that DSLR of mine…gotta go make some money to pay for all the chemistry and materials now!


")
")
")


